Arduino Step Sequencer: in questa guida presentiamo il codice per realizzare uno step sequencer basato su Arduino Uno.
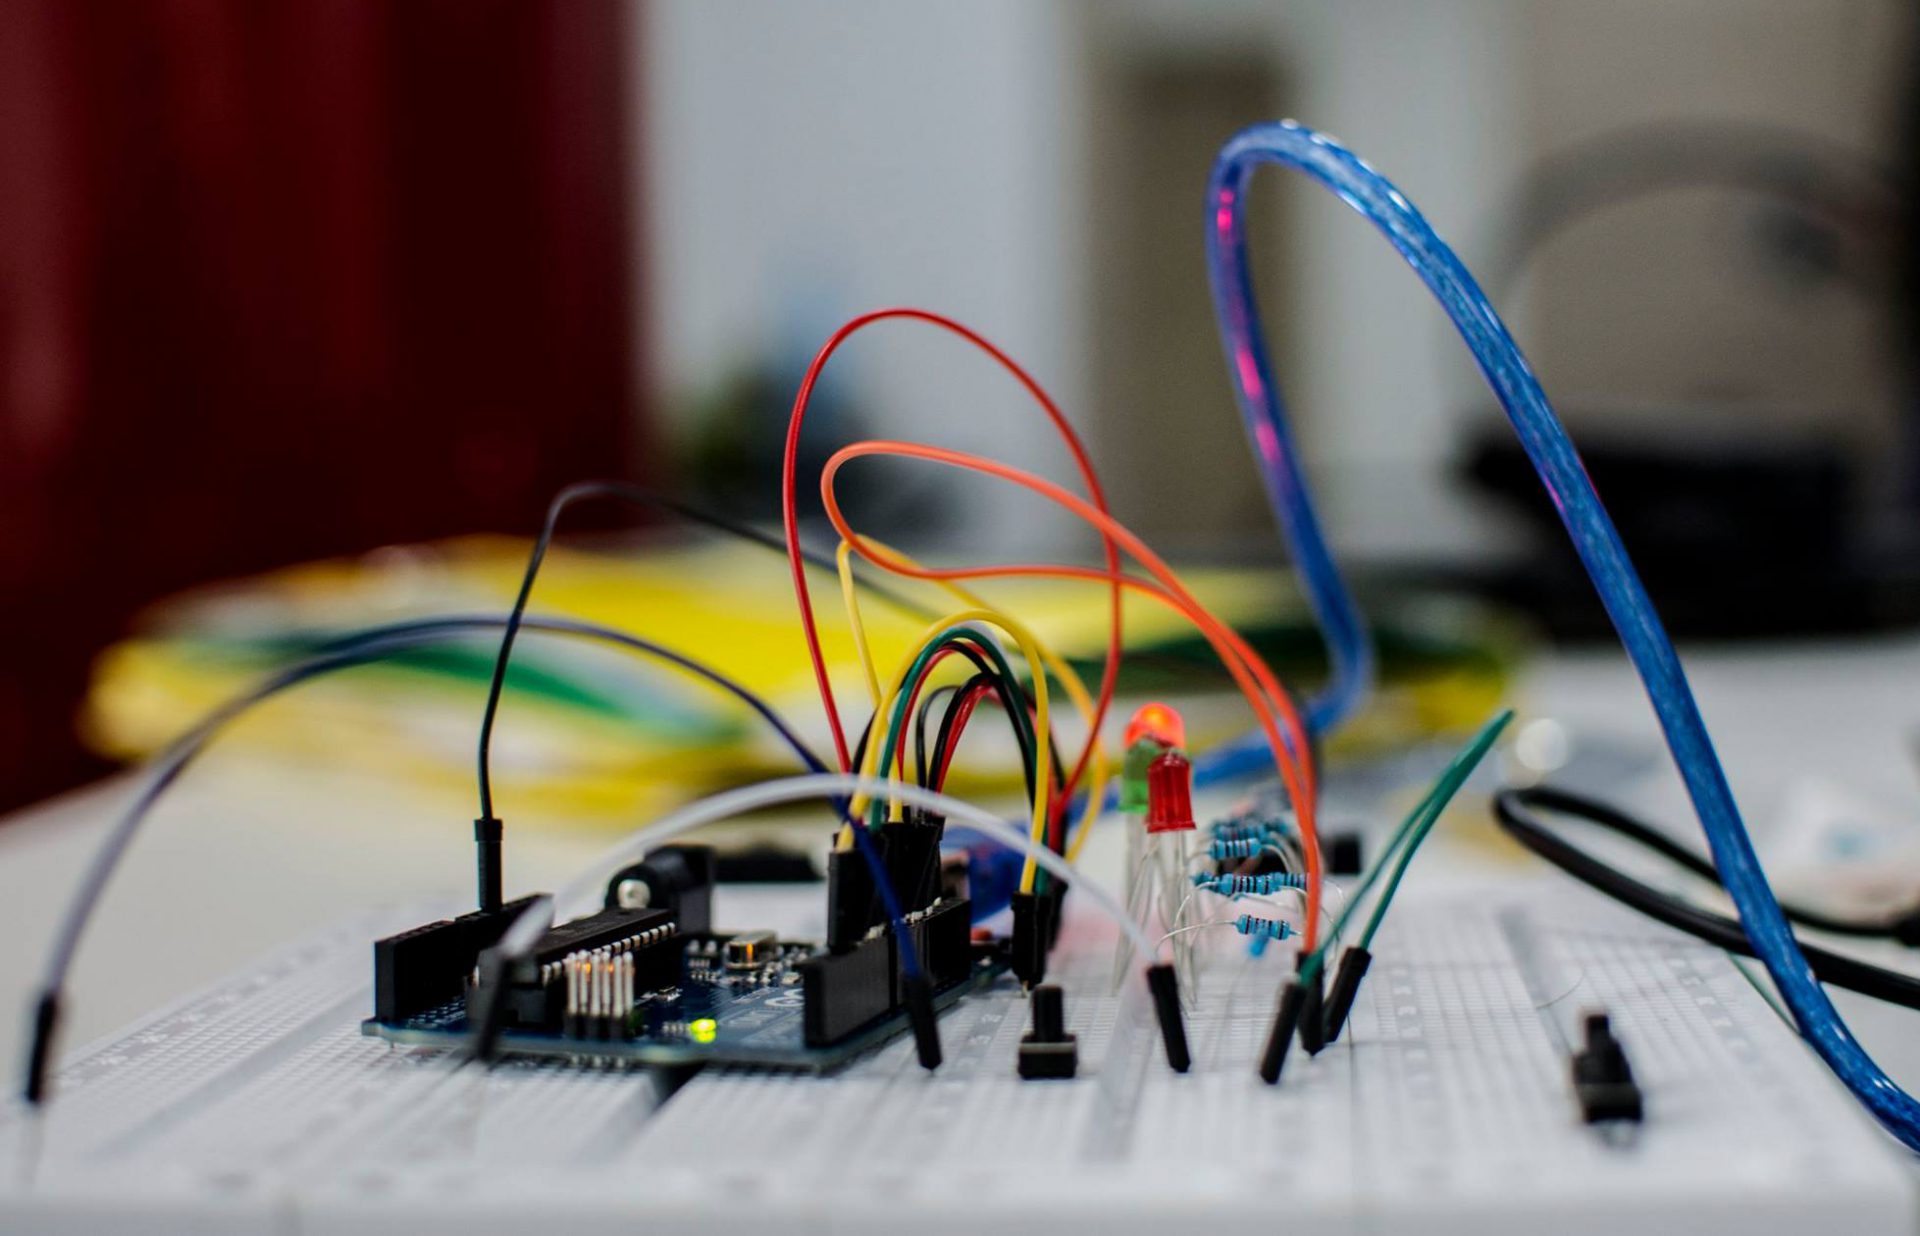
Per informazioni sul circuito da realizzare rinviamo al nostro prototipo di Step Sequencer.


Il codice per lo Step Sequencer
/*
  ++ 6 STEP SEQUENCER ++

  DESCRIPTION:
  Reads values from 6 potentiometers to change the pitch of any step
  of the sequencer tone generator.
  Change the pitch of each step with a potentiometer.
  A switch connect to digital port 3 allows to turn on/off the sequencer

  CIRCUIT:
  Connect a speaker or piezo to pin number 9 and to ground;
  Connect the first lead of a potentiometer to 5v and the last to ground,
  the one in the middle to Analog Input pin 0;
  (Repeat for all the four potentiometers connecting the middle lead to
  Analog Input pins 0, 1, 2, 3, 4, 5);
  Connect a switch from digital port 3 and ground, put a 220 Ohm Resistor
  between the digital port 3 and 5V;

  This code is derived by a previous sketch made by
  Alessandro Contini & Paolo Cavagnolo

  This program is free software: you can redistribute it and/or modify
  it under the terms of the GNU General Public License as published by
  the Free Software Foundation.

  This program is distributed in the hope that it will be useful,
  but WITHOUT ANY WARRANTY; without even the implied warranty of
  MERCHANTABILITY or FITNESS FOR A PARTICULAR PURPOSE.
  See the GNU General Public License for more details.

  You should have received a copy of the GNU General Public License
  along with this program.  If not, see <http://www.gnu.org/licenses/>.

  Copyright © 2016 Costantino Rizzuti
  Artis Lab © 2016
  www.artislab.it
  info@artislab.it
*/

// Tones table definition
#define NOTE_B0  31
#define NOTE_C1  33
#define NOTE_CS1 35
#define NOTE_D1  37
#define NOTE_DS1 39
#define NOTE_E1  41
#define NOTE_F1  44
#define NOTE_FS1 46
#define NOTE_G1  49
#define NOTE_GS1 52
#define NOTE_A1  55
#define NOTE_AS1 58
#define NOTE_B1  62
#define NOTE_C2  65
#define NOTE_CS2 69
#define NOTE_D2  73
#define NOTE_DS2 78
#define NOTE_E2  82
#define NOTE_F2  87
#define NOTE_FS2 93
#define NOTE_G2  98
#define NOTE_GS2 104
#define NOTE_A2  110
#define NOTE_AS2 117
#define NOTE_B2  123
#define NOTE_C3  131
#define NOTE_CS3 139
#define NOTE_D3  147
#define NOTE_DS3 156
#define NOTE_E3  165
#define NOTE_F3  175
#define NOTE_FS3 185
#define NOTE_G3  196
#define NOTE_GS3 208
#define NOTE_A3  220
#define NOTE_AS3 233
#define NOTE_B3  247
#define NOTE_C4  262
#define NOTE_CS4 277
#define NOTE_D4  294
#define NOTE_DS4 311
#define NOTE_E4  330
#define NOTE_F4  349
#define NOTE_FS4 370
#define NOTE_G4  392
#define NOTE_GS4 415
#define NOTE_A4  440
#define NOTE_AS4 466
#define NOTE_B4  494
#define NOTE_C5  523
#define NOTE_CS5 554
#define NOTE_D5  587
#define NOTE_DS5 622
#define NOTE_E5  659
#define NOTE_F5  698
#define NOTE_FS5 740
#define NOTE_G5  784
#define NOTE_GS5 831
#define NOTE_A5  880
#define NOTE_AS5 932
#define NOTE_B5  988
#define NOTE_C6  1047
#define NOTE_CS6 1109
#define NOTE_D6  1175
#define NOTE_DS6 1245
#define NOTE_E6  1319
#define NOTE_F6  1397
#define NOTE_FS6 1480
#define NOTE_G6  1568
#define NOTE_GS6 1661
#define NOTE_A6  1760
#define NOTE_AS6 1865
#define NOTE_B6  1976
#define NOTE_C7  2093
#define NOTE_CS7 2217
#define NOTE_D7  2349
#define NOTE_DS7 2489
#define NOTE_E7  2637
#define NOTE_F7  2794
#define NOTE_FS7 2960
#define NOTE_G7  3136
#define NOTE_GS7 3322
#define NOTE_A7  3520
#define NOTE_AS7 3729
#define NOTE_B7  3951
#define NOTE_C8  4186
#define NOTE_CS8 4435
#define NOTE_D8  4699
#define NOTE_DS8 4978


// Declaration of tones used in the sequencer
// Define here the note you want to play.
// The first notes are mapped to the lowest position of the pots
int pitch[] = {
                NOTE_C3,
                NOTE_GS3,
                NOTE_CS3,
                NOTE_AS3,
                NOTE_A3,
                NOTE_B3,
                NOTE_F4,
                NOTE_DS4,
                NOTE_E4,
                NOTE_G3,
                NOTE_D4,
                NOTE_FS4};


// Declaration of variables
int speaker = 13;                          // Speaker output pin
int k=0;                                     // Variable to store the value of the loop
int POT1 = A0;                              // POT1 pin
int POT2 = A1;                              // POT2 pin
int POT3 = A2;                              // POT3 pin
int POT4 = A3;                              // POT4 pin
int POT5 = A4;                              // POT5 pin
int POT6 = A5;                              // POT6 pin
int ReadPot1,ReadPot2,ReadPot3,ReadPot4,ReadPot5,ReadPot6;                            // Variable to store the value of the pots
// Variables used to calculate tempo
// set BPM
int bpm=180;
// set Subdivision 1=quarter note; 0.5 ->eight note, ....
float subdivision=1;
//Define here the sequence of durations
//-> 1->quarter note; 0.5 ->eight note, ....
// Duration of notes for each step
float D[] = {1, 0.5, 0.5, 0.333, 0.333, 0.333}; //3/4 pattern
//float D[] = {1, 0.5, 0.5, 1,0.5, 0.5}; //4/4 pattern
// The lenght of the D array
int NDuration=6;
int DurCount=0;
int value[] = {0, 0, 0, 0, 0, 0};              // value to define the discrete interval of tune using the pot
int note[] = {0, 0, 0, 0, 0, 0};
int interval;

void setup() {
    pinMode(3, INPUT);
    //Period computed according bpm and subdivision
    interval = 60000/(subdivision*bpm);
}


void loop() {
   if(digitalRead(3)==HIGH){
    for (k = 0; k <= 5; k++) {// Cycle on each pot       // Mapping the value of the Potentiometer to have a wider range of values value[k] = map(analogRead(k), 0, 1023, 0, 2500); // Discretization of the pot intervals - in order to assign the note if ((value[k]>=0) && (value[k]<100)) note[k] = 0; if ((value[k]>=100) && (value[k]<300)) note[k] = pitch[0]; if ((value[k]>=300) && (value[k]<500)) note[k] = pitch[1]; if ((value[k]>=500) && (value[k]<700)) note[k] = pitch[2]; if ((value[k]>=700) && (value[k]<900)) note[k] = pitch[3]; if ((value[k]>=900) && (value[k]<1100)) note[k] = pitch[4]; if ((value[k]>=1100) && (value[k]<1300)) note[k] = pitch[5]; if ((value[k]>=1300) && (value[k]<1500)) note[k] = pitch[6]; if ((value[k]>=1500) && (value[k]<1700)) note[k] = pitch[7]; if ((value[k]>=1700) && (value[k]<=1900)) note[k] = pitch[8]; if ((value[k]>=1900) && (value[k]<=2100)) note[k] = pitch[9]; if ((value[k]>=2100) && (value[k]<=2300)) note[k] = pitch[10]; if ((value[k]>=2300) && (value[k]<=2500)) note[k] = pitch[11]; float Duration=D[DurCount]*interval; tone(speaker, note[k], Duration);// Play the note      DurCount++;      if(DurCount>=NDuration)DurCount=0;

      delay(Duration);
    }
   }
}
Senti come suona!
Questo codice è stato utilizzato nell’oggetto sonoro Oracolo realizzato da Costantino Rizzuti (2016). Guarda alcuni video dimostrativi:
Osservazioni e problemi
Questo semplice codice è molto efficace per cominciare, ma ha un grosso problema per quanto riguarda la precisione di esecuzione degli intervalli di tempo. Infatti la funzione delay(), utilizzata per controllare la scansione temporale degli eventi, è piuttosto imprecisa (ha una risoluzione di qualche millesimo di secondo) e non consente di realizzare una precisa successione di eventi equidistanti nel tempo. Per questo motivo è molto difficile utilizzare questo codice per realizzare più sequenze di note che possono essere soprapposte e montate per creare tracce con materiali musicali più complessi. Per risolvere questo problema è stato creato un nuovo codice (Arduino 8 bit music: programmazione avanzata di uno step sequencer) che utilizza un sistema di temporizzazione differente basato sull’uso della funzione micros() di Arduino che fornisce una maggiore precisione temporale dell’ordine dei microsecondi.
Qui è possibile ascoltare alcune tracce realizzate programmando il nostro prototipo PDSynth-00 con quest’ultima versione del codice che realizza lo step sequencer.
Perché non dai anche uno sguardo ai nostri prodotti?
[ecwid widgets=”productbrowser” categories_per_row=”3″ grid=”1,2″ list=”60″ table=”60″ default_category_id=”0″ default_product_id=”0″ category_view=”grid” search_view=”list” minicart_layout=”MiniAttachToProductBrowser”]

Se ti piace questo progetto e vuoi provare a realizzarlo per problemi, curiosità oppure suggerimenti scrivici qui di seguito:
3 thoughts to “Come programmare uno step sequencer con Arduino”